Reasons to Convert to a Gas Fire Pit
Wood fire pits may be simple to install, but they’re not always the best option for those looking to install a fire pit at their home. Many urban developments restrict the use of wood fire pits due to safety concerns (an uncontrolled fire can spread dangerously). Beyond that, wood fire pits require the extra hassle of always having wood on hand to burn. This requires extra storage space, and because the wood is often stored outdoors, you’ll often find it’s wet and difficult to start a fire.
There’s also the issue of smoke. Though nothing smells more like fall than a nice campfire, you don’t necessarily want to smell like one all day—which is exactly what will happen if the wind is blowing in the wrong direction as you burn.
Advantages of Gas Fire Pits
Gas fire pits don’t have the same challenges as wood fire pits. These kits are safe, easy to ignite, and simple to install with the right knowledge beforehand. You’ll also be able to ditch the wood pile, and you and your guests won’t smell like smoke the next time you decide to gather around the fire pit at night! These are some of the biggest reasons gas fire pits have become the new go-to installation for restaurants, hotels, and backyards alike.
Many wood fire pits are bought as pre-configured paver stone kits from big box stores. These make an excellent starting point for a gas fire pit. If you already have a wood fire pit installed, it only takes a few steps to convert to gas.
Step-by-step: How to Convert a Wood Fire Pit to Gas
Step 1: Choose Your Fuel Type
The question you’ll need to ask yourself is what type of fuel you’d like for your gas fire pit: propane or natural gas. If you plan on using this fire pit for decades to come, it may be worth running a natural gas line to save on long-term fuel costs.

Many who convert their wood fire pits to gas will use a 20-pound propane tank—the tank like you would use on most gas grills. While this may be a more convenient option than running new gas lines, keep in mind the size of your fire pit will be limited by the BTU output of the smaller tank (approximately 125,000 BTU), so be sure to review the specifications of the burner kit you’d like to purchase. You can also give us a call, and we can help you find a kit to meet your needs.
Step 2: Select Your Fire Pit Burner Ignition Type
After deciding on your fuel type, you’ll need to consider your fire pit’s ignition type. Ignition type refers to how you’ll light your fire pit each time you want to use it. You’ll want to think about when and where you intend to use your fire pit as well as your budget for the build.
There are three main types of ignition system you’ll want to be aware of:
Match Light Fire Pit Kits

These manually ignited systems are our most popular kits thanks to their simplicity and durability. Although you’ll need a match or lighter each time you want to use your fire pit, the lack of electronic components means these kits are at the top of the list for reliability. They’re our most affordable option, too, if budget is a large factor in your purchase.
Spark Ignition Fire Pit Kits

Spark ignition kits offer a small step up from match light kits in the form of a piezo spark igniter. This push button option offers added convenience while retaining a relatively simple design. If your grill or stovetop has a spark igniter, you’ll already be familiar with how this system works.
Electronic Ignition Fire Pit Kits

Electronic ignition kits offer the highest level of performance available. These systems offer reliable ignition at the push of a button and can even be used with a remote control for an even more convenient design. It’s important to note, however, these units require electricity at the fire pit to operate and you won’t be able to use one with a 20-pound propane tank. Given their premium nature, these systems also cost more. If cost and setup are no issue, though, you’ll have a fire pit as good or better than anything you’d find at a luxury resort or high-end restaurant.
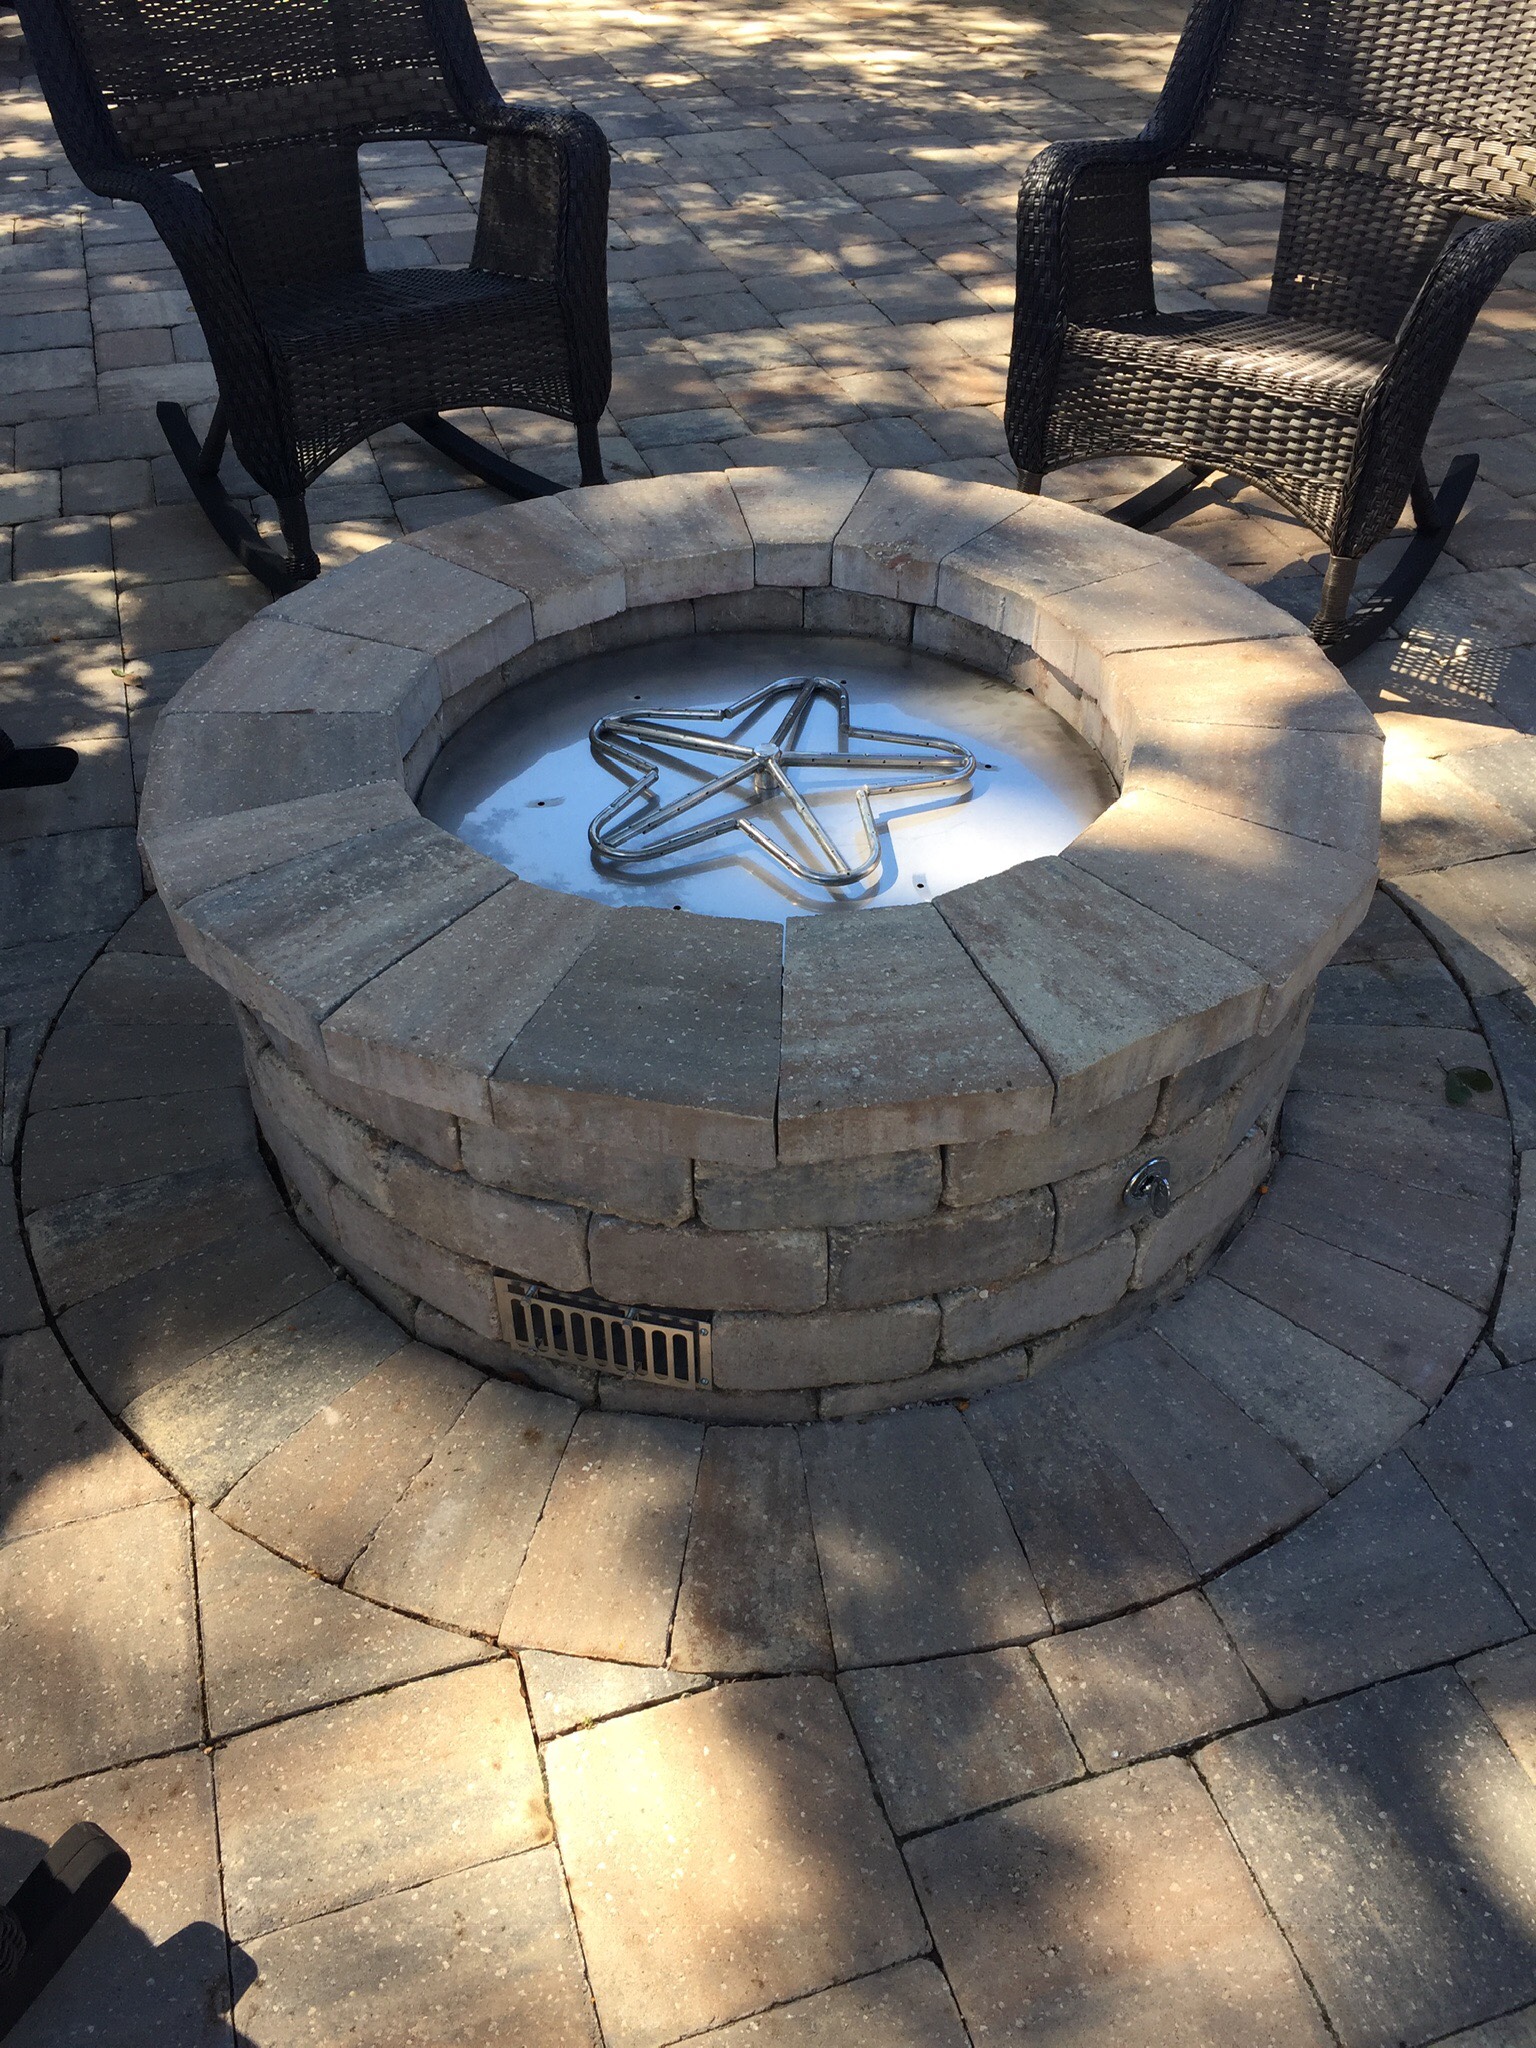
Step 3: Select Your Burner Shape
Your burner shape is completely up to you, but star-shaped penta burners are our most popular option for simple round or square fire pits. Each style of burner has its strengths, so be sure to check out our full selection of products before you decide on a favorite.
The size of your burner should be chosen based off the size of the inside dimension of your enclosure. Some of our manufacturers have different regulations for burner size, but a good rule of thumb is to have three inches between the edge of the burner and the inside edge of your pan on all sides, so a difference of six inches between burner size and inside fire pit dimensions.
Step 4: Install Adequate Ventilation

For both propane and natural gas, 36 square inches of ventilation is required to create proper air flow within your fire pit. This ventilation ensures your fire pit gases combust properly and avoid pooling. While leaving open holes is an option, using two of our vent covers will provide the correct amount of airflow while also keeping small pests out and providing a professional finished look for your installation.
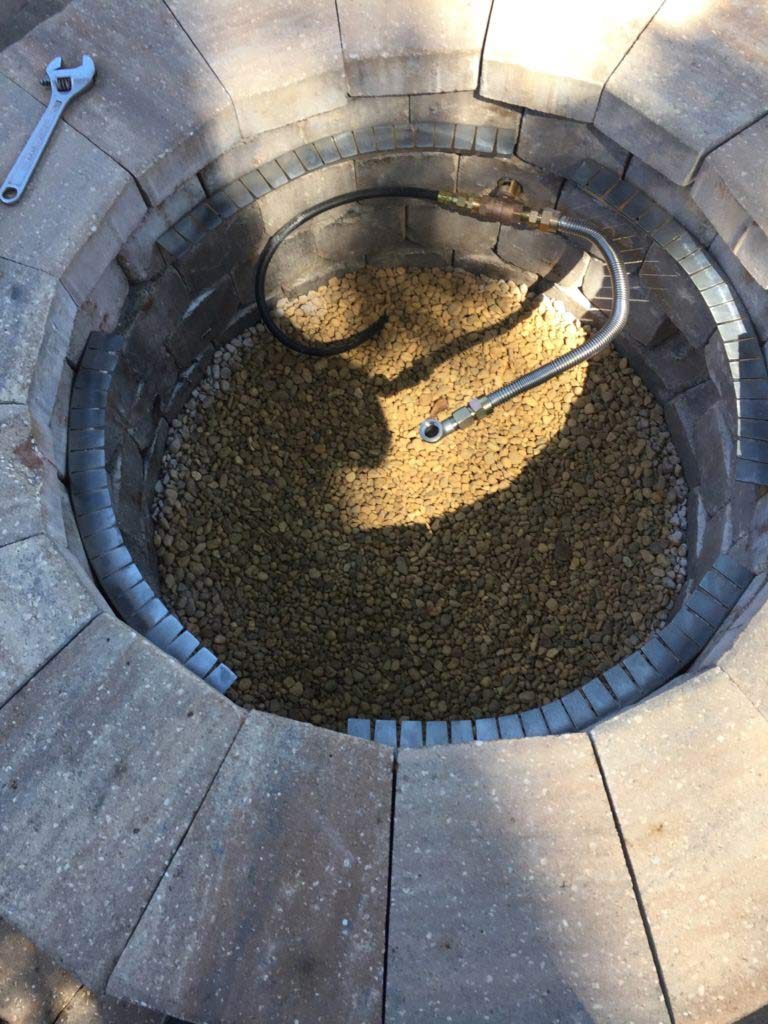
Step 5: Locate the Gas Valve
Most of our burner kits will feature a 1/4-turn ball valve that controls the flow of gas to the burner. You'll want to mount this valve somewhere that’s easily accessible, like the side of your enclosure. If your stone or pavers are thicker than three inches, a flange extension and extended length key will be necessary to ensure your valve can be controlled through the bricks. We core out a 1-3/8-inch hole to allow the flange extension to feed through. Not many people will own an expensive core drill, but these can often be rented from a local hardware store from a reasonable fee. You can also purchase one of our paver kits to mount the valve and flange for easy access.
Step 6: Mount the Fire Pit Pan
If you’re using propane, you’ll need to include a fire pit pan with your kit. A pan is an essential component with propane burner kits for proper flame performance and safety. For natural gas, a fire pit pan is not required, but we still highly recommend using one to assist with proper drainage, decrease the amount of media you’ll need, and to provide an overall more professional appearance. A pan also makes it easier to access your gas lines in the event your fire pit ever needs repaired.
If you’re using a fire pit pan, we recommend using a flat pan in combination with our installation collars . The collars are easy to install using a Tap-Con drill bit and screws to anchor the weight of the pan and burner. If your paver kit came with a metal insulating ring, you can remove and discard it for use with gas. Gas will not burn as hot as wood does, so there’s less of a concern to crack to bricks from heat.
Once your installation collars are installed, simply lower your pan onto the ledges and you’re ready to select media.
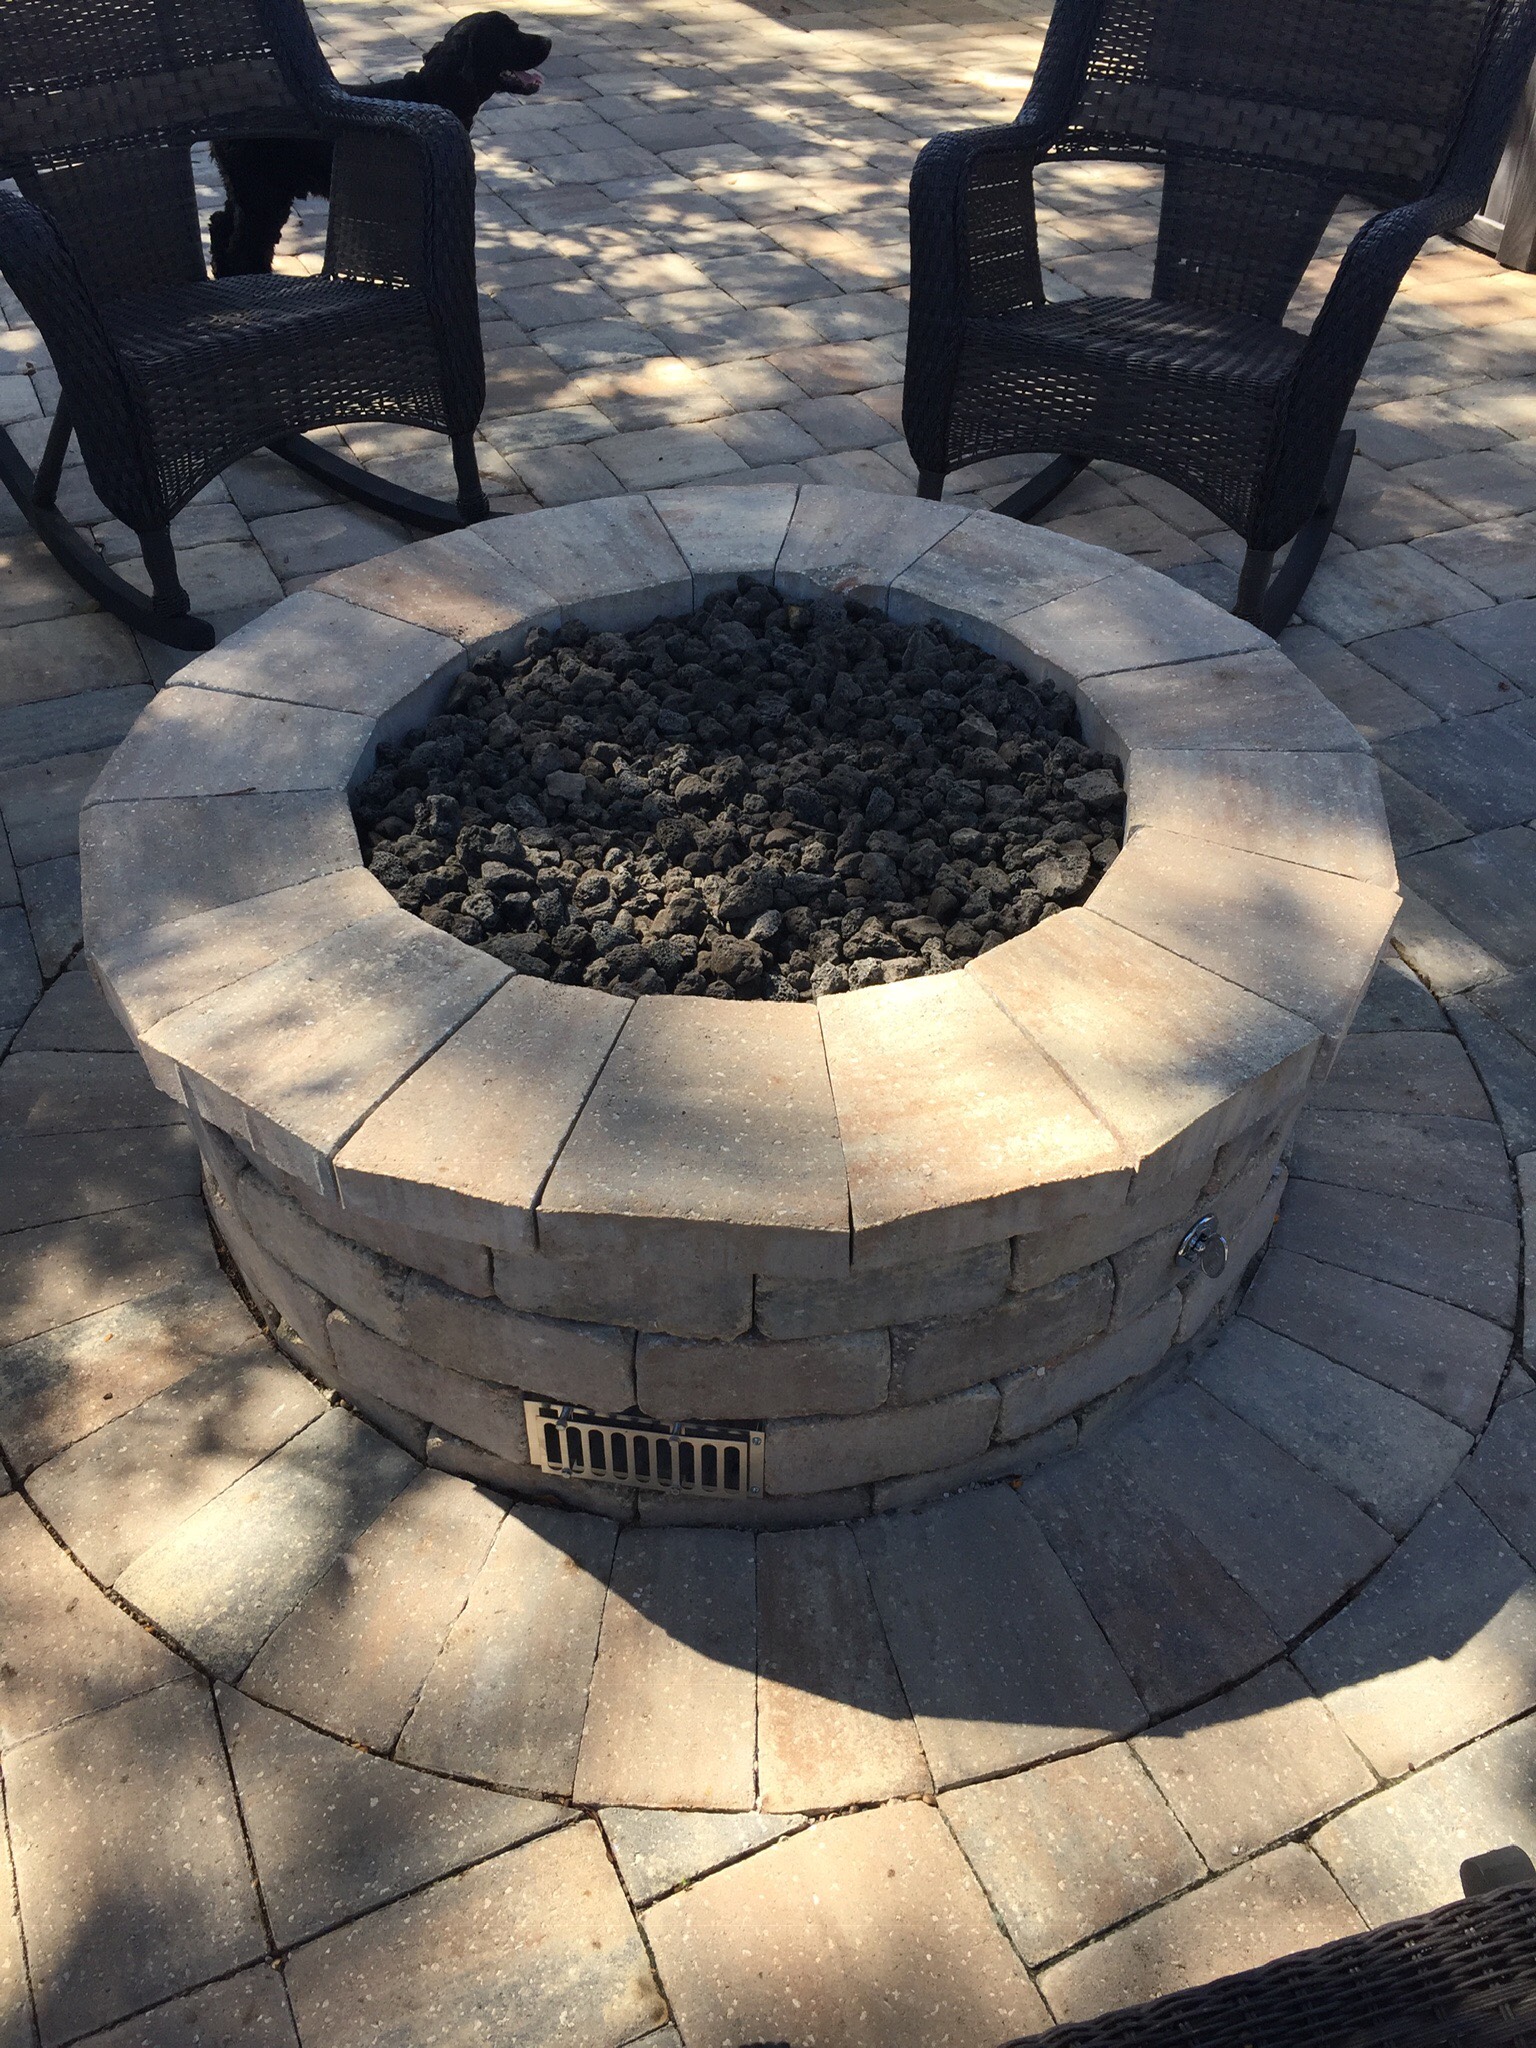
Step 7: Select Your Fire Pit Media
Selecting fire pit media is arguably the most fun part of the building process. No matter your color palette or outdoor décor, there’s something to fit your needs. All media works the same way, which is by allowing gas to disperse around the pieces for a full flame appearance. Beyond that, the choice of color or style is completely up to you.
Lava rock is a classic option as well as the most economical. This organic stone makes a beautiful media option that matches nearly any design style. Fire glass offers a more contemporary option for those looking for something more unique. This glass comes in countless sizes, styles, and colors, so choosing the right option can be daunting. That said, we’ve found red and black to be the most popular color choices across the board. Blue can also be a great option if the fire pit sits next to a backyard pool.
Final Considerations for Your Fire Pit Project
It’s important to note all gas connections should be made by a qualified installer to ensure safety. Gas fire pits, if installed properly, are safer to operate than wood fire pits—but that’s what makes a safe installation so important. A professional installer can also help to ensure proper gas supply pressure and BTU output. This can help you avoid frustrating problems like whistling or poor flame performance.
If you have any questions about converting, designing, or installing your gas fire pit, give us a call at 888-977-6849. We have a team of designers who do this for a living, so we can make the process simple and straightforward. With some dimensions and general direction, we can help you take the first steps toward the fire pit you’ve always dreamed of.
If you use this guide we'd love to see your finished product, as well. We love to feature completed customer projects in our inspiration gallery. Speaking of which, it’s a great free resource to start planning your own project. Click the link below to check out some of the great designs our customers have created.
We specialize in customized fire pits but can work with our vendors to create a fully custom design as well. For more info on the difference, check our Custom vs. Customized Guide.